Fixing public datasets — Re-annotating Animals 10
Public datasets are surely handy, but are they always dandy? We found that many large public datasets contain some amount of erroneous data, however, scrolling through thousands of images manually is quite time-consuming. Luckily, we can parallelize this task by having thousands of people go through a dataset with Rapidata.
Dataset
For this post, we will have a look at Animals-10. The description says:
All the images have been collected from "google images" and have been checked by human. There is some erroneous data to simulate real conditions (eg. images taken by users of your app).
Well, I'd rather have a clean dataset and inject the noise only when I need it. Let's fix that.
Essentially, all we need is people to look at an image and specify whether it is one of the ten classes or something else. Rapidata's classify order is perfect for this task. Below we will show you how to set up a project to re-annotate the dataset. But first, let's look at the outcome.
Results
In total, out of the 23,999 images, 483 had an incorrect label. That's about 2% of the dataset! Errors fall into two buckets: images that should have been another of the 10 classes and images that should not be in this dataset altogether.
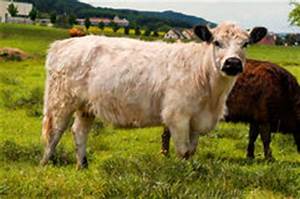
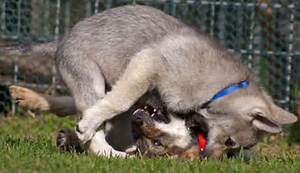
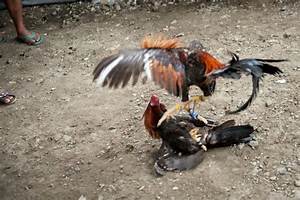
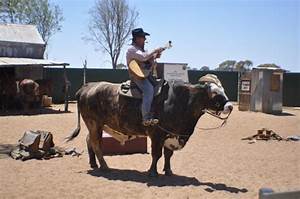
Here are a few examples for image labels that were fixed:


Other categories
Here are the some images that don't fit into any of the 10 classes, which was a much bigger bucket:
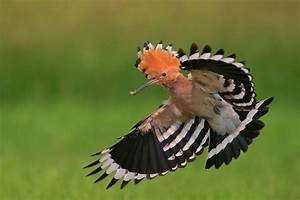
Colorful as a butterfly, but actually a Eurasian Hoopoe (original: butterfly, new: something else)
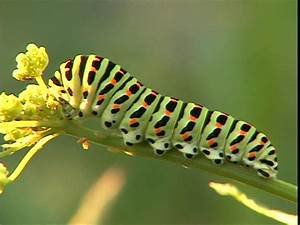


Evidently, we successfully identified quite a few mislabelings. The corrected dataset is now available to be explored and downloaded on Hugging Face.
Setting up the project
We will use this data in the following example, but feel free to use your own.
First, we need to install the Rapidata package:
pip install rapidataThen we can start setting up the project. We will can start by importing the necessary packages and creating the Rapidata client object:
from rapidata import RapidataClient

rapi = RapidataClient()
From there we can define the categories and the path to the images. Presenting the user with too many categories can lead to an overload, so it's best to use a maximum of 8 categories. Since we have 10 classes at hand, we first label 6 categories and specify an addional 7th category that we call "Something else". All the categories that are not part of the 6 categories are then labeled as "Something else". In a second step we can then label those with the remaining 4 categories.
CATEGORIES_BATCH_1 = ["Cat", "Dog", "Cow", "Spider", "Butterfly", "Elephant"]
CATEGORIES_BATCH_2 = ["Horse", "Chicken", "Sheep", "Squirrel"]

VAL_ID_BATCH_1= "677fca8b5273ea16a0c24721"
VAL_ID_BATCH_2= "677fcaeb5273ea16a0c24722"
Starting the order
Setting up the actual labeling order is now relatively simple. First we get all the image paths:
import os

MEDIA_FOLDER = "path/to/image/folder" # make sure it's unzipped

file_paths = [os.path.join(MEDIA_FOLDER, file) for file in os.listdir(MEDIA_FOLDER)]
Then we can create the order:
order = rapi.order.create_classification_order(
    name="Animal Classification Batch 1",
    instruction="What is shown in the image?",
    answer_options=CATEGORIES_BATCH_1 + ["Something else"],
    datapoints=file_paths,
    responses_per_datapoint=20,
    confidence_threshold=0.97,
    validation_set_id=VAL_ID_BATCH_1
)
The labeling stops for a datapoint when the confidence level for a category exceeds 97% (typically achieved with 3-4 human labels), even if it hasn't reached the full 20 responses. This threshold is controlled by the confidence_threshold parameter. In case these labels are ambiguous, more labels will be collected, but never more than 20 for a single image.
The two validation set ids have been pre-generated. For more info, check out our documentation.
Obtaining the results
We have two ways to monitor the progress of the order, either we head over to app.rapidata.ai or we can also use the SDK to show a progress bar using order.display_progress_bar()
Once the order is finished, we can download the results, either using the UI or the SDK with order.get_results().
That's it!
Next steps
Now it's up to you to label the rest of the data by creating a 2nd order with all the images that were labeled as "Something else" in the first order. You can use the same code as above, just with the second batch of categories and the corresponding validation set id. Finally you can merge the results of both orders to get the full dataset.